About Me

Lolo Moku is Crazy Island. That is my family. We are an island, and taking care of this island is a fulltime job. This blog is my outlet. Hope you all enjoy my recipes, fails, and all around views on life. :)

Monday, February 25, 2013

Parsnip (not so) Chips...(Clean)

Parsnip "Chips"

So in our quest to find suitable chip replacements, I stumbled across someone talking about different root vegetables that you can slice into chips. Well, after the kale and zucchini chips debacle (different story all together), I decided to try parsnips. If you've never seen or tried parsnips, they are a little like a spicier carrot. Same shape and appearance, just white instead of orange. I have actually also put these in my Sausage and Potato Soup, in addition to potatoes, with great success. You just have to get used to the flavor and accept that they will never taste like potatoes. :) These are one of my husband's favorites that I  make here recently. I have to make at least 2 just for him. 


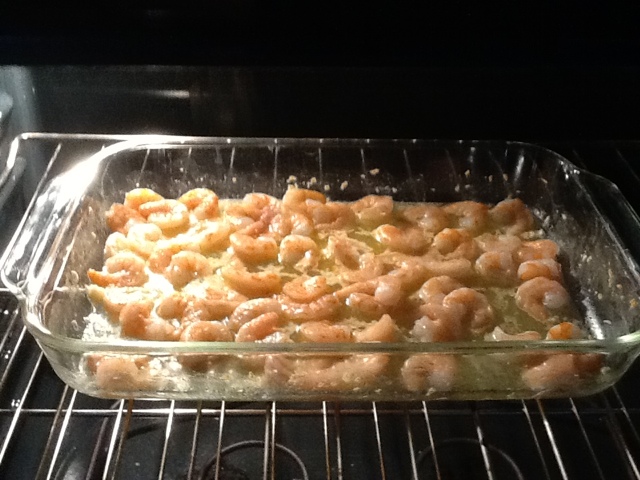
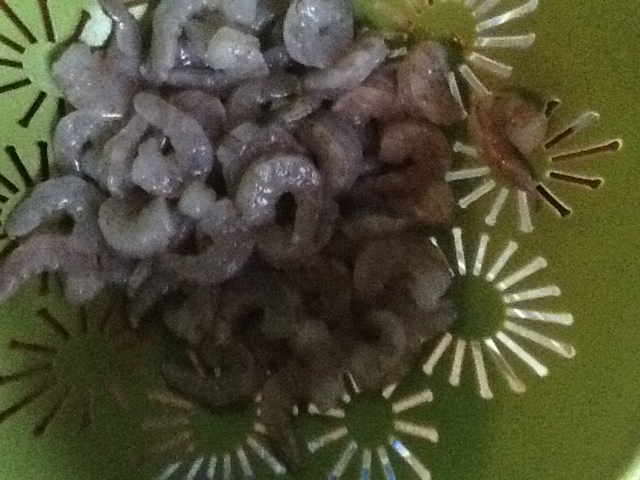
This is simple. Peel and slice some parsnips, at least one per person that is going to share these with you. Put in a bowl with Olive Oil and seasoning of your choice. I like to use Mrs Dash no salt Garlic and Herb seasoning and a little bit of sea salt. Bake at 400 for 10-15 minutes, or to desired crispiness. These are not actually "chip like". It really depends on the thickness, and length of time in the oven. I will update after I try these at a lower temp for longer to see if that helps. 

Parsnip "Chips"

1 parsnip per person, peeled and sliced
Olive Oil (just enough to coat slices)
2 turns of a sea salt dispenser
Tbs seasoning of choice

Stir all ingredients in a bowl and lay out on a piece of parchment in a single layer. Bake at 400 for 10-15 minutes.

Seasoning suggestions: 
Cajun spices
Ranch dressing mix
Mrs Dash (any flavor)
Garlic salt and pepper

Sky's the limit on this one. Just experiment with your favorite flavors. I would love to hear if you try something that ROCKS. Please let me know. :)

Thursday, February 21, 2013

My Favorite - Baked Buffalo Chicken Eggrolls (Cheat)

Baked Buffalo Chicken Eggrolls

This recipe by CanYouStayForDinner  for Buffalo Chicken Egg Rolls is by far my favorite addition to my family's "Appetizer Night". Appetizer night started a while back, when we decided that eating out constantly was expensive for what you get. So my oldest and I would go to the grocery store and pick out all of our favorite appetizers that we can get at the restaurant, and then make our own. Well, fast forward to our "healthy eating initiative", and I had to go on a hunt to replace frozen apps and add some that are healthier. Enter "Buffalo Chicken Egg Rolls". These not only satisfy a need for buffalo flavor, but help on the low carb front too. I changed a few things from the original recipe, but you can definitely add or subtract anything you don't like. I leave out the broccoli slaw, but if you are a slaw lover - please put it back in. :)


So first things first:  Go to the grocery store and buy egg roll wrappers. You can find them in the Produce department. (You could also do wontons, but I haven't tried out the cook time yet) You also need to cook up some chicken and shred it into a bowl. Add buffalo sauce (I use Frank's, but just use whichever one you like best). There is no magic amount to add, just add it up to your heat tolerance level ;)


Next, I put a cookie cooling rack on my largest baking sheet. I also use one of those grill racks you can buy to put fish on to grill out. Then start laying out the wraps to get started. 


Next place your ingredients in the middle on the wrap as shown. This time around I used real blue cheese crumbles, but most of the time I use Laughing Cow Blue Cheese wedges and just smear some on the wrap before placing the buffalo chicken on.. Now, if you have family members that don't like blue cheese (I KNOW!!! Shocking, right?), you can use any cheese they like inside. I just use whatever I have on hand, and then separate those with and without, so as not to mix them up... 


Now start folding the wrap...kinda like an envelope? First the bottom corner up, then fold both sides in. Be careful not to rip the wrap. They are VERY durable, but I manage to rip at least one. And if I do rip one, I just wrap another one around it. Works fine. 


Lastly, you need to wet the edges so they will stay sealed when you fold the top down. Line them up on the rack and spray with cooking spray. Bake at 400 for approx 15 minutes...give or take a few. I keep an eye on them, and if they are starting to burn without crisping, I take them out and spray them again just to keep from burning. I don't have a good After picture, but even if I did, they would never look as awesome as Andie's do. :)

Buffalo Chicken Egg Rolls


  • Shredded chicken (use as much or as little as the amount of egg rolls you are making)
  • Buffalo Sauce (I alternate between the "buffalo" and the "hot" sauce depending on what I have) 
  • Blue cheese crumbles or Laughing Cow blue cheese wedges
  • Egg Roll wrappers
  • Cooking spray

Assemble wraps as shown in pictures, and bake at 400 for 12-15 minutes. Serve with Ranch dressing or Blue cheese dressing, if you like. But caution! These are smoking hot inside. So if your family is planning Appetizer Night, you can definitely bake these first...they will stay hot longest! 


Update: I messaged the blogger to let her know how much we loved these, and that I was planning on putting this recipe on my blog, and she actually messaged me back to say thank you. To me, that is super nice! :)

Thursday, February 14, 2013

And now for the Norwegian waffles...

Norwegian Waffles

When visiting my family in Norway, these yummy waffles are usually served with coffee, sodas for the kids, and an assortment of chocolates. Most Norwegian families serve these when guests come over as an after dinner treat.  My kids love them no matter the time of day, so learning to make them has been a quest for a while. 

This recipe has taken most of my adult life to get right, but I am happy to say that I have finally done it! I had done an internet search of "Norwegian waffler", and could not believe the amount of different recipes there are out there. So last time my Mom and I were together, I showed her the one I thought sounded right, and she gave me her thoughts, and this is what I came up with in the end. :) 

Norwegian Waffles - makes 12 sets

6 Eggs
1/2 cup of sugar (give or take depending on preferences)
1 tsp Cardamom
1 1/2 cups of flour
1 tsp baking soda
1 cup sour cream
1/4 tsp salt
1/2 cup butter (totally forgot this step today, but no one complained) 

Mix together all the eggs, sugar and cardamon until well blended. Next add in the flour, baking soda and salt. Last, add the sour cream and butter and mix very well until the batter is smooth. Easiest way is to get out the mixer, but I am usually in a hurry, so I just mix it all up. Then I let the batter rest while I heat up the waffle iron. Traditionally these are heart shaped, but you can use whatever waffle iron you have. :)  Once ready, use a ladle and put about a ladle's worth into the center of the iron and close the lid.  These waffles are best served slightly soft - not crispy like American waffles.

I wholeheartedly recommend the waffle iron from Bed Bath and Beyond. It has a "doneness" dial that allows you to change the time and whether you want a crispy exterior or uniform texture, etc.

I am going to try to "lighten" these up soon, and will post if it passes the "KID TEST". :)

Monday, February 11, 2013

And just 4 ingredients to YUMMY fish:

Parmesan Baked Fish

I was extremely skeptical of this recipe at first, but I now LOVE it!  Fish can get boring, and this is an excellent way to change things up. We use the olive oil mayo to keep it a little healthier and low carb. 


Simple instructions - mix together mayo, parm cheese, Worcestershire and green onions. Spread over fish and bake at 400 for 20 minutes, or until fish is flaky. Then enjoy. :)

Parmesan Baked Cod

2/3 cup mayo
1/4 cup parmesan cheese (grated cheese)
1 tsp Worcestershire 
handful of green onions
4 pieces of Cod (or any thick fish)

Mix 4 ingredients together and spread over fish. Bake at 400 for 20 minutes - give or take, depending on thickness of fish

Saturday, February 9, 2013

And our favorite soup...with a low carb option

Sausage and Potato Soup


My husband LOVES Zuppa Toscana soup that Olive Garden serves, and I have been trying for a long time to replicate that recipe with little success. I have this one , which he says is not quite the same, but still tastes good, so we'll stick with it. Zuppa Toscana has Kale in it, and I rarely remember to buy that at the store. It tastes fine without it, so don't worry if you don't have it. I can say, from experience, that putting celery in it...not so yummy. And I am a big fan of celery in soup. :(


Sausage and Potato Soup

1 small onion
6 potatoes (have also used turnip/parsnips..tastes great)
1 Tube of Spicy sausage (if you are sensitive to spicy food use regular sausage)
3-4 cloves of garlic - minced (or grated)
1-2 containers of chicken broth
Half a stick of butter
Dash of heavy cream

Start the onion cooking in a large skillet with butter. Meanwhile, I cut up the potatoes/turnips/parsnips..usually a combination of them all.  (If you are skipping carbs like potatoes, turnips are best option. They take on the soup's flavor best.) Sometimes I also add more because I really like the bulk. Put those in a stock pot large enough to cook soup in.
Once the onions are softened, I put those into the pot with the potatoes and get the sausage started browning in the same skillet. I grate the garlic into the sausage and cook both together until sausage is cooked through. Add to pot with potatoes and onions.
Next add enough chicken stock to the pot to cover all the ingredients and cook until potatoes are soft.
Add the butter, kale (if using) and cream and cook until Kale is ready. Usually only a few minutes. 
Serve it while it's hot (but be careful IT'S HOT) :)
Thank you to my friend Lori for getting me started on this one. She makes a TON of it and would bring it to work for everyone to enjoy. :)


This is before cream and butter is added. 

And after butter and cream are added in.

Thursday, February 7, 2013

And now for the not so healthy:

Easy Cheese Danish

I hope that you will all forgive me for what I am about to post. It is not in the slightest bit healthy, and is downright addicting. When we were in Norway last year, my grandmother had made a coffee cake that my kids fell in love with and raved about for days...still even. Well, I hate buying them in the store, and when I found this recipe, I knew I had found a quick fix that takes a lot less time than flying to Norway to have my grandmother make us one. :)

Okay, when I say this is easy you know that I am telling the truth. I don't make any recipe that is hard. Seriously. If it has more than 10 ingredients, I am usually out. lol. I found this recipe here,  and could not love it more.

Here is my oldest, helping me out. First we mix together cream cheese, sugar, vanilla and flour. Just smear it around really good until all ingredients are completely incorporated. Next is the hard part...and when I say hard part, the hardest part to me is getting the tube open without tearing all the crescent rolls to pieces. ;) Roll the crescent rolls out onto a nonstick baking sheet in one long piece. Smoosh the perforations together so that it appears to have no holes or gaps. 
Then put the cream cheese mixture down the center of the dough, leaving about an inch at either end and about two inches on the sides. You will then cut diagonal slits in the dough as pictured. It does NOT have to be perfect (as you can see lol), just approximate and try not to rip the dough like I did several times. Luckily this recipe is very forgiving. Now you'll start "braiding" the dough. 

I wish I had thought to take pictures along the way, but the original blog can help you out there. Basically, you will just start alternating sides, and overlapping the pieces as you go. Honestly, mine was less than pretty going into the oven, but the dough puffs up and makes it pretty. You'll see.
Bake at 375 for about 20 minutes, or until it looks golden brown like a crescent roll should look. :)
Mix together the final ingredients to make the frosting. Drizzle over and then try to take a picture before the entire family is in the kitchen taking pieces.

So yummy! Oh, and try almond extract to give it a really tasty, unique flavor.

Easy Cream Cheese Danish

Ingredients:

1 8-oz. package cream cheese, softened
1/2 cup granulated sugar
1 teaspoon vanilla extract 
3 tablespoons all purpose flour
1 tube crescent rolls


1 cup powdered sugar
4+ tablespoons heavy cream (last time I didn't have heavy cream and used milk. use less)
splash vanilla extract
(almond is really good too)

Mix together cream cheese, sugar, vanilla and flour until smooth. Roll out crescent rolls. Smear cream cheese mixture down the middle, cut slits, and braid together. Bake at 375 for 20 minutes or until crescent appears cooked.

Sunday, February 3, 2013

And the night I decided to try making Scampi:

Shrimp Scampi 


So last night we were in the mood for shrimp, but digging through my Pinterest boards for the recipe I used last time was proving more difficult than my hungry belly was going to allow. So I decided to just put in what sounded good, which for those who know me know that this could be a recipe for disaster. I may cook alot, but it is out of necessity, not because I have a talent for it. :) Here is what I decided to put in it (which turns out to be a pretty standard scampi recipe):


I started with about a pound of raw shrimp, peeled. I then put a stick of unsalted butter into my casserole dish and put it in the oven to melt while I peeled 4 cloves of garlic. 


After the butter is melted, I grated the 4 cloves of garlic into the dish. I use a handheld  grater ala Rachael Ray. I have TERRIBLE knife skills, so mincing this much garlic would take me forever. :)
To  this I added some white wine and white pepper. I didn't measure the white wine, but after looking up a Red Lobster copy afterwards, it says a cup of white wine. 


We plated this with spaghetti squash and Parmesan cheese. You could serve over rice or noodles too. Or just eat it in a bowl with nothing. However you like it best. 


Shrimp Scampi

1lb Raw shrimp - peeled and deveined
about 1 cup white wine
1 stick of butter - melted
4 cloves of garlic
pinch of white pepper

Combine all in a glass Pyrex dish and bake at 350 for 7-10 minutes, or until shrimp turns pink. Serve with noodles (or spaghetti squash to save carbs)

ENJOY!